How to Fix Uneven Bathroom Tiles | Expert Repair Tips and Guide
Master the Secrets: How to Fix Uneven Bathroom Tiles and Transform Your Space Today
Few things can disrupt the elegance and comfort of your bathroom more than uneven tiles. Not only do they mar the visual harmony of your space, but they can also pose safety hazards, snag your towels, or make cleaning a headache. Fortunately, mastering how to fix uneven bathroom tiles is achievable with the right approach, patience, and a sprinkle of expert knowledge. Whether you're a seasoned DIY enthusiast or just starting your home improvement journey, this detailed guide will illuminate every step you need to take to restore your bathroom’s beauty.
What Causes Bathroom Tiles to Become Uneven Over Time?
Understanding the root causes of uneven tiles is key to a successful repair. The most common culprits include structural shifts, improper installation, water damage, and settling of the foundation. Over time, the substrate beneath your tiles can crack or shift, resulting in unsightly bumps, loose tiles, or gaps. Additionally, poor initial installation—such as uneven adhesive application or insufficient surface preparation—can lead to long-term unevenness. Recognizing these factors helps you decide whether to repair or entirely replace the affected area.
How Can I Identify if My Bathroom Tiles Are Truly Uneven?
Detection is the first step in effective repair. To assess whether your tiles are uneven, try these simple methods:
Visual Inspection: Walk around and look at the tiles from different angles, noting any visible gaps or bumps.
Use a Level Tool: Place a carpenter’s level across multiple tiles to check for discrepancies in height.
Check for Movement: Gently press on loose tiles. If they shift, they need re-anchoring.
Addressing even minor unevenness early can prevent more extensive damage down the line, saving you time and money in the future.
What Are the Best Tools and Materials Needed to Fix Uneven Bathroom Tiles?
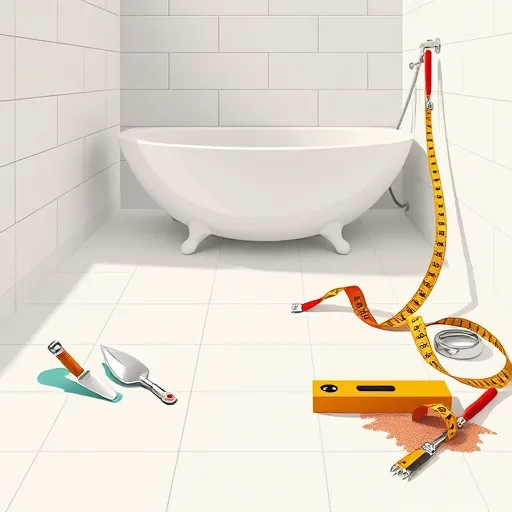
Being well-equipped streamlines the repair process. Essential tools include:
Hammer and chisel
Tile adhesive or thin-set mortar
Grout and grout float
Tile spacers
Measuring tape and straightedge
Level
Wet tile saw or tile cutter
Protective gear (gloves, goggles)
High-quality materials ensure durable, long-lasting repairs, so don’t skimp on choosing the right products. For complex renovations, consulting with a professional may provide added assurance and guarantees of quality.
How Do I Prepare the Surface for Repairing or Replacing Tiles?
Preparation is crucial for a seamless repair. Follow these essential steps:
Clear the Area: Remove all bathroom fixtures, rugs, and accessories around the affected tiles.
Remove Damaged Tiles: Carefully chisel out loose or cracked tiles, taking care not to damage surrounding tiles or the substrate.
Clean the Surface: Use a brush or vacuum to remove dust, debris, and old adhesive residues.
Inspect the Substrate: Look for cracks, water damage, or mold. If significant issues are detected, consider consulting professionals for a full substrate overhaul.
Proper preparation guarantees that new tiles will adhere properly, providing a smooth, even surface that stands the test of time.
What Is the Step-by-Step Process for Fixing Uneven Tiles?
Addressing uneven bathroom tiles involves a systematic approach:
Assess the Extent of the Unevenness: Use a level and visual inspection to identify problematic areas.
Remove Unstable Tiles: Use a hammer and chisel to carefully take out tiles that are loose or cracked.
Chisel and Prepare the Substrate: Level out the surface, filling depressions with self-leveling compound if necessary.
Apply New Adhesive: Spread a generous layer of high-quality tile adhesive with a notched trowel.
Set New Tiles: Place the tiles carefully, pressing firmly and using spacers to ensure uniform grout lines.
Level the Tiles: Continuously check with a level tool to guarantee evenness as you work.
Allow to Cure: Let the adhesive set as per manufacturer instructions, avoiding any weight or pressure on the tiles.
Applying Grout: Fill the gaps with grout, ensuring no air pockets. Clean excess grout with a damp sponge for a polished look.
If the unevenness is stubborn or extensive, consider leveraging professional bathroom remodeling services to ensure flawless results.
How Can I Prevent Uneven Tiles in Future Bathroom Installations?
Prevention begins with meticulous planning and execution during initial installation. Here are some tips:
Hire Experienced Professionals: Skilled installers understand the nuances of proper substrate preparation and adhesive application.
Use the Right Tools and Materials: Always choose high-quality tiles, adhesives, and grouts suitable for bathroom environments.
Ensure the Surface Is Super Flat: Use self-leveling compounds to create a perfectly even base before tiling.
Follow the Manufacturer’s Instructions: Each product has specific application protocols—adhering to these is essential for durability and safety.
Control Bathroom Conditions During Installation: Maintain optimal temperature and humidity levels to prevent adhesion issues caused by environmental factors.
Investing in quality and precision in your initial installation can save significant effort and expense later. For more comprehensive home upgrades, explore home addition solutions to elevate your entire living space.
Can I Fix Uneven Bathroom Tiles Myself or Should I Hire a Professional?
Deciding whether to undertake the repair yourself or hire experts depends on the severity of the unevenness, your DIY skill level, and available tools. Small issues, like minor bumps or loose tiles, can often be managed with basic tools and patience. However, larger problems—such as significant substrate shifts, water damage, or extensive unevenness—are better handled by seasoned professionals.
Engaging specialists ensures a lasting, flawless finish and can prevent recurring issues. Visit general contractor services for comprehensive guidance and execution of complex bathroom renovations.
What Red Flags Indicate That Repair or Replacement Is Necessary?
Watch out for these indicators that your bathroom tiles require urgent attention:
Cracks or significant bumps that affect safety and aesthetics
Loose or wobbly tiles that fall under pressure
Gaps or grout deterioration that allow water infiltration
Persistent mold or water damage beneath tiles
Visible foundation or substrate cracks
Addressing these issues promptly not only restores beauty but ensures your bathroom remains a safe and comfortable place. Updating or remodeling your entire space through services like bathroom remodeling can rekindle your home's charm.
What Are Some Common Mistakes to Avoid When Fixing Uneven Bathroom Tiles?
Even experienced DIYers can make pitfalls during tile repair. Be mindful to avoid:
Skipping proper substrate preparation—this compromises adhesion
Using low-quality or incompatible adhesives and grouts
Ignoring level checks during tile placement
Rushing the curing process—allow sufficient time for adhesives and grout to set
Not sealing grout properly, leading to water damage and mold growth
Meticulous attention to detail ensures your project results in a durable, smooth, and beautiful surface.
Conclusion: Elevate Your Bathroom’s Beauty and Safety Today
Mastering how to fix uneven bathroom tiles transforms a frustrating problem into an opportunity for renovation and renewal. Whether you choose a DIY approach or hire seasoned professionals, the goal remains the same—creating a sleek, safe, and inviting space that adds value to your home. Remember, a well-executed tile repair not only enhances aesthetics but also safeguards your environment from future damage. If you're considering broader updates or complex remodeling, explore outdoor living solutions or custom home builds for the ultimate upgrade experience.
Don’t leave your bathroom issues unresolved. Take action today and turn your renovation dreams into reality with confidence and expertise at your side.


